
Your first Cisco lab: the CLI basics
Boot one router, configure an interface, ping a PC. Free, ungraded, no account — the basics every other lab assumes.
Get the lab
One file to import into CML: router R1 wired to PC1. PC1 is already set up — you configure R1.
Free · ungraded · no sign-in.
Ten steps from blank router to a working ping
Type each one yourself in R1's console.
Import and start the lab
Download
first-cisco-lab.yamlbelow and import it into CML (Dashboard → Import), then press Start. When the nodes are running, click R1 and open its console. New to CML? The getting-started guide covers installing it.You should land at a
Router>prompt. If you're asked “Would you like to enter the initial configuration dialog?”, typenoand press Enter.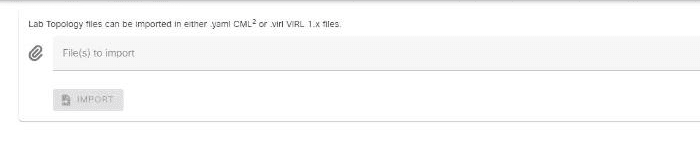
Dashboard → Import, then choose imports/lab-work.yaml from the unzipped package. Meet the command line (user EXEC mode)
That
Router>prompt is user EXEC mode — read-only. Four habits to build now:- Help: type
?to list what you can do, orshow ?for everythingshowcan do. - Tab completion: type
pinthen press Tab — IOS finishes it toping. - Abbreviation: shorten any command to the fewest unique letters —
sh ip int brisshow ip interface brief. - Command history: press ↑ to bring back your last command.
Nothing you do in user EXEC can change the device — explore freely.
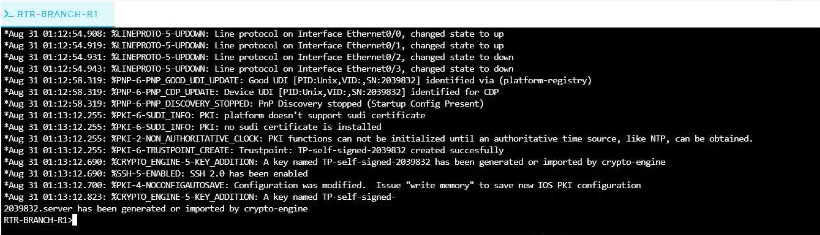
Open a node's console and you land here — user EXEC mode, read-only. - Help: type
Enter privileged EXEC mode
Type
enable. The prompt changes from>to#— privileged EXEC mode, with full access to view and change. This lab has no enable password set, so it just works.Have a look around before you change anything:
Router# show ip interface brief
Router# show version
Router# show running-config
What you should see from
show ip interface brief— the Ethernet interfaces are all down, because we haven't configured them yet:Interface IP-Address OK? Method Status Protocol Ethernet0/0 unassigned YES unset administratively down down Ethernet0/1 unassigned YES unset administratively down down Ethernet0/2 unassigned YES unset administratively down down Ethernet0/3 unassigned YES unset administratively down down Loopback0 unassigned YES unset up upLoopback0 is a virtual interface — ignore it for now.
show versiongives the IOS version and uptime;show running-configis the live configuration. We only need Ethernet0/0 for this lab.Enter global configuration mode
Enter global configuration mode with
configure terminal(orconf t). The prompt gains(config):Router# configure terminal Enter configuration commands, one per line. End with CNTL/Z. Router(config)#Everything you type here changes the running configuration immediately.
Set the hostname
Give the router a name. The prompt changes the instant you press Enter:
Router(config)# hostname R1 R1(config)#Configure the interface and bring it up
Give Ethernet0/0 an address and turn it on.
interface Ethernet0/0drops you into interface configuration mode ((config-if)#):R1(config)# interface Ethernet0/0 R1(config-if)# description Link to PC1 R1(config-if)# ip address 192.168.1.1 255.255.255.0 R1(config-if)# no shutdownWhat you should see — a moment after
no shutdown:%LINK-3-UPDOWN: Interface Ethernet0/0, changed state to up %LINEPROTO-5-UPDOWN: Line protocol on Interface Ethernet0/0, changed state to updescriptionis optional — it just labels the port. Interfaces are administratively down by default;no shutdownenables them. The mask255.255.255.0is a/24.Back out and verify
Return to privileged EXEC with
end(or Ctrl+Z), then check your work:R1(config-if)# end R1# show ip interface briefWhat you should see — Ethernet0/0 is now
up/upwith your address:Interface IP-Address OK? Method Status Protocol Ethernet0/0 192.168.1.1 YES manual up up Ethernet0/1 unassigned YES unset administratively down down Ethernet0/2 unassigned YES unset administratively down down Ethernet0/3 unassigned YES unset administratively down down Loopback0 unassigned YES unset up upBoth right-hand columns need to read
up— line status, then protocol.Ping PC1 — the payoff
PC1 is already set to
192.168.1.10with its gateway at192.168.1.1— the address you just gave R1:R1# ping 192.168.1.10What you should see:
Type escape sequence to abort.
Sending 5, 100-byte ICMP Echos to 192.168.1.10, timeout is 2 seconds:
.!!!!
Success rate is 80 percent (4/5), round-trip min/avg/max = 1/1/2 ms
Each
!is a reply; a.is a timeout. The first packet often shows a.while ARP resolves PC1's MAC address — run the ping again for a clean!!!!!.Save your work
Your work lives in the running-config (RAM). A reload boots from the startup-config (NVRAM) instead and loses it. Save the running config to startup:
R1# copy running-config startup-config
Destination filename [startup-config]?
Press Enter to accept the destination.
Building configuration...
[OK]
write memory(orwr) does the same thing.Find your way around the modes
The whole map you just used:
Router>User EXEC — read-only. enter with: log inRouter#Privileged EXEC — full view + save/reload. enter with:enable(config)#Global config — change the device. enter with:configure terminal(config-if)#Interface config — change one interface. enter with:interface Ethernet0/0To move back out:
exit— steps back one level (interface → global → privileged).endor Ctrl+Z — jumps straight back to privileged EXEC from any config mode.disable— drops from privileged EXEC back to user EXEC.
When it doesn't workCommon IOS messages, decoded
Everyone hits these on day one.
% Ambiguous command: "co"Too few letters — co could be configure, copy, and more. Type a few more.
% Incomplete command.The command needs more after it — ip address still needs an address and mask. Add ? at the end to see what IOS expects.
% Invalid input detected at '^' marker.A typo, or you're in the wrong mode. The ^ points at the character IOS didn't like — check your spelling and your prompt.
Nothing happens when I type a config commandConfig commands only work in a config mode. From a > or # prompt, type enable, then configure terminal, first.
Ready for the real thing?
Build it, submit your config, get pass/fail on every requirement. Then pick from the CCNA labs.
Cisco, Cisco IOS, and Cisco Modeling Labs are trademarks of Cisco Systems, Inc. Goldfish Networks is not affiliated with or endorsed by Cisco; we publish independent practice labs that import into CML.